If you think about the roots of a plant, they burrow down into the soil. The roots are necessary for the plant to grow, receive nutrients, and stand tall. The same way that plants have roots, as do we.
Our roots can be referred to as our ancestral line which includes our parents/caretakers and generations before. Our roots can also be referred to as our past, going way back into our childhood and even into the womb. Our roots can also be referred to as how we choose to ground ourselves in the present moment.
Broadly speaking, I think that when we talk about our “roots” we can really refer to all of the above as a way to reference how we show up in the world today. How we grow, the nutrients we receive and how we receive them, and the foundation by which we stand on our own two feet are set long before this present day.
Who we are today, is whether we like it or not, dictated by our roots. The things that we do, the way we see the world, and our beliefs and values are shaped by those before us. That’s not to say that it has to remain that way. As we start to awaken to the conscious journey, we may start to understand in what way our roots have been serving us or not serving us.
I would say that if you are alive and reading this article, your roots have served you well. However, you may also agree that things from your past show up in your present self which you might wish to change. There may be thought or behavioral patterns that you feel are no longer serving you and to achieve your highest and best self it may be necessary to pivot.
In order to pivot though, we still need to turn to our roots to understand where we came from and where we would like to go. So I guess, no matter what, we always have our roots to thank because they have gotten us to where we are right now.
Supporting Pose 1: Cow Face Pose Arms (Gomukhasana)
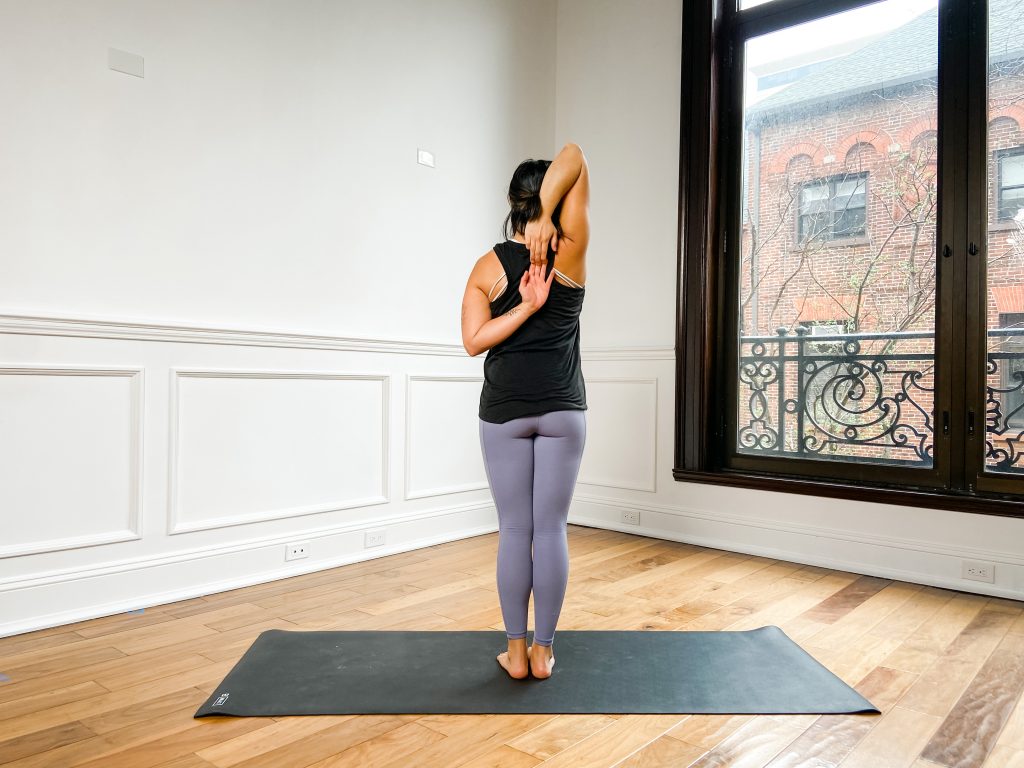
Cow Face Pose arms are a great way to teach movement and action in the arms, shoulders, chest, and upper back. Binding is way more than just bringing the hands together, the entire shoulder girdle has to work synchronously in order to join the hands and ultimately create more space. In the case of Marichyasana, the practitioner is binding around the leg, so this pose here allows us to focus on just the arm movements for the time being bringing in other elements later on in the sequence.
How to:
- Stand in Upward Hands pose (Urdhva Hastasana).
- Bend your right elbow and bring the right hand towards the upper back. Notice any compensation in the spine and rib basket here. Try to keep the spine [more-or-less] neutral.
- Swim the left arm around the back by reaching the whole arm back. Draw the left shoulder blade towards the spine to widen the chest. Then bend the left arm so the left hand also comes towards the upper back.
- Join the hands together and use the bind as an anchor to stretch the spine and lift the chest. Look straight ahead to ensure the chin isn’t tucked towards the chest.
Pro tip: You can use a belt for this posture. To set it up, place the belt over the right shoulder. Follow the steps above, but instead of connecting the hands, the hands will connect to the belt. Use the strap to walk the hands towards one another.
Supporting Pose 2: Sugarcane Pose (Ardha Chandra Chapasana)
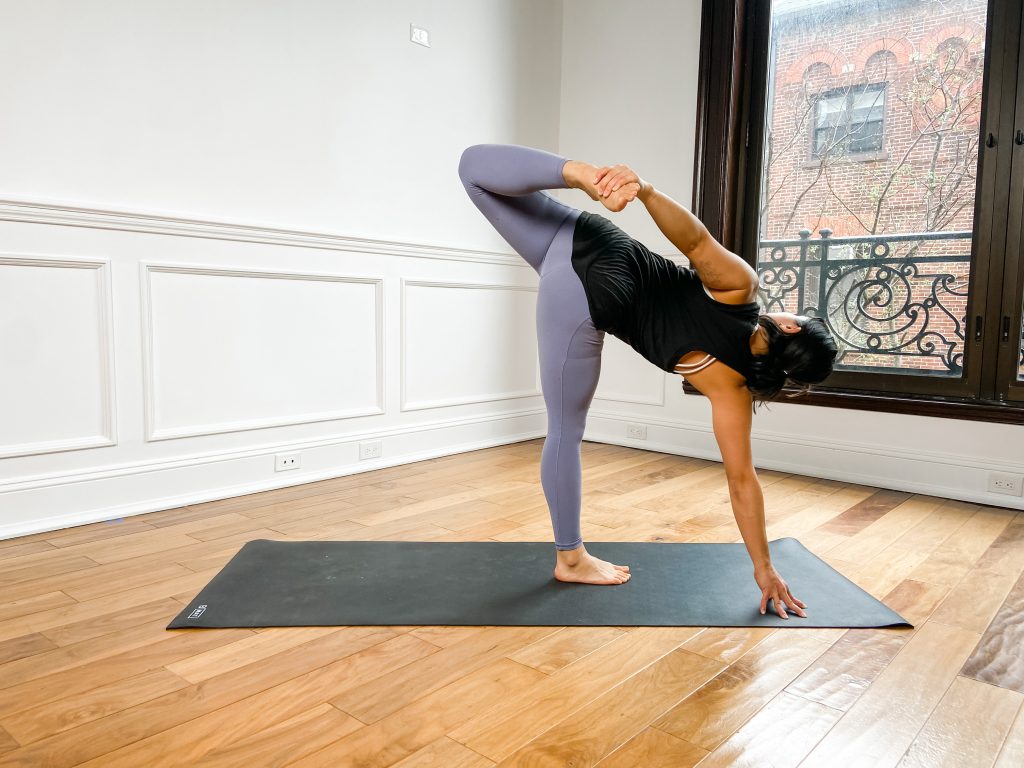
Sugarcane is appropriate for our peak pose because it teaches the “swimming back” of the top arm to reach the foot which assists in the appropriate action of the shoulder blade in binding. It also requires the practitioner to fold the top leg in order to connect hand and foot before coming into the backbend.
How to:
- Start in Triangle pose (Trikonasana).
- Shift the weight onto the front leg and come into half-moon with the top leg extending straight to the back of the room.
- Roll the torso towards the sky as you open to the side wall.
- Fold the top leg bringing the heel towards the bum and swim the top arm back to grab hold of the foot. Move the shoulder blade towards the spine as you do so.
- Once the hand and foot are connected, gently press the foot into the hand to roll the chest towards the sky, firm the sacrum towards the pubis, and come into a backbend.
Supporting Pose 3: Devotional Warrior (Baddha Virabhadrasana)
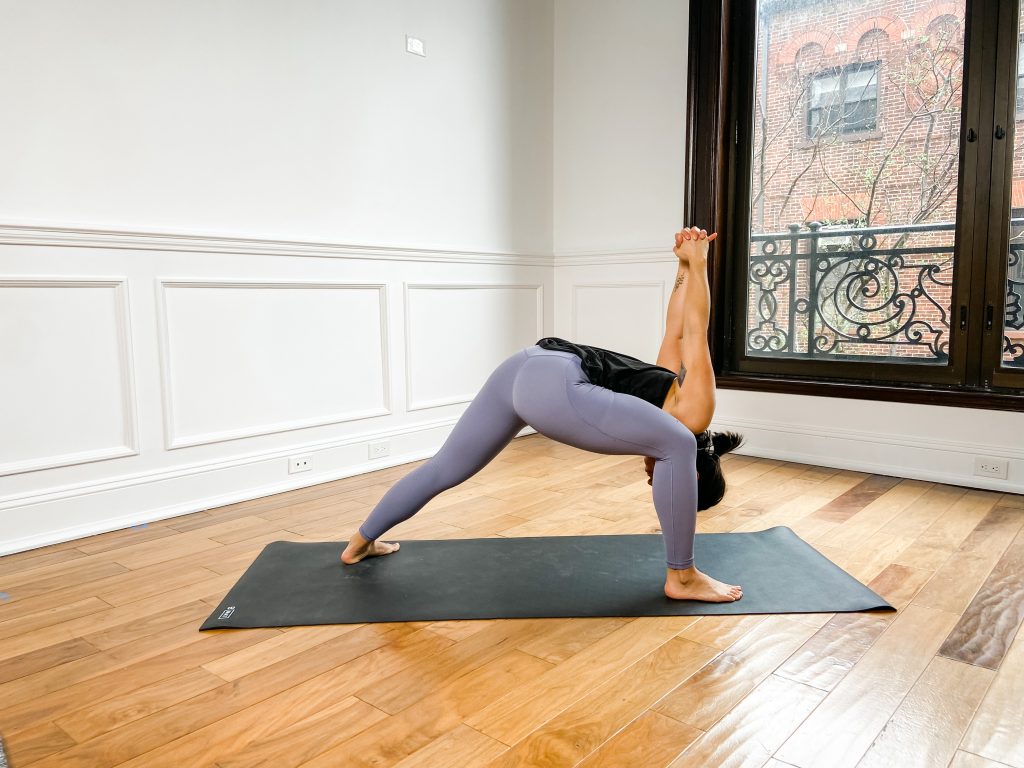
Anything with the hands behind the back is a good prep for binding since it shifts the focus to the movement of the shoulder blades in order to move the arms. This pose in particular is great for Marichyasana because it also brings the head down towards the floor, guiding the practitioner in an appropriate direction according to the peak pose.
How to:
- Start in Warrior I. For this pose, widen the feet towards the long edges of the mat to create more stability through the transition and also to maintain balance in the actual pose.
- Swim the arms behind the back and notice the movement of the shoulder blades coming together to clasp the hands.
- Fold forward towards the inside of the front leg. Draw the front hip back to maintain [more-or-less] squared hips to the front of the room.
- Stretch the arms towards the sky to continue bringing the shoulder blades towards one another while the head goes down.
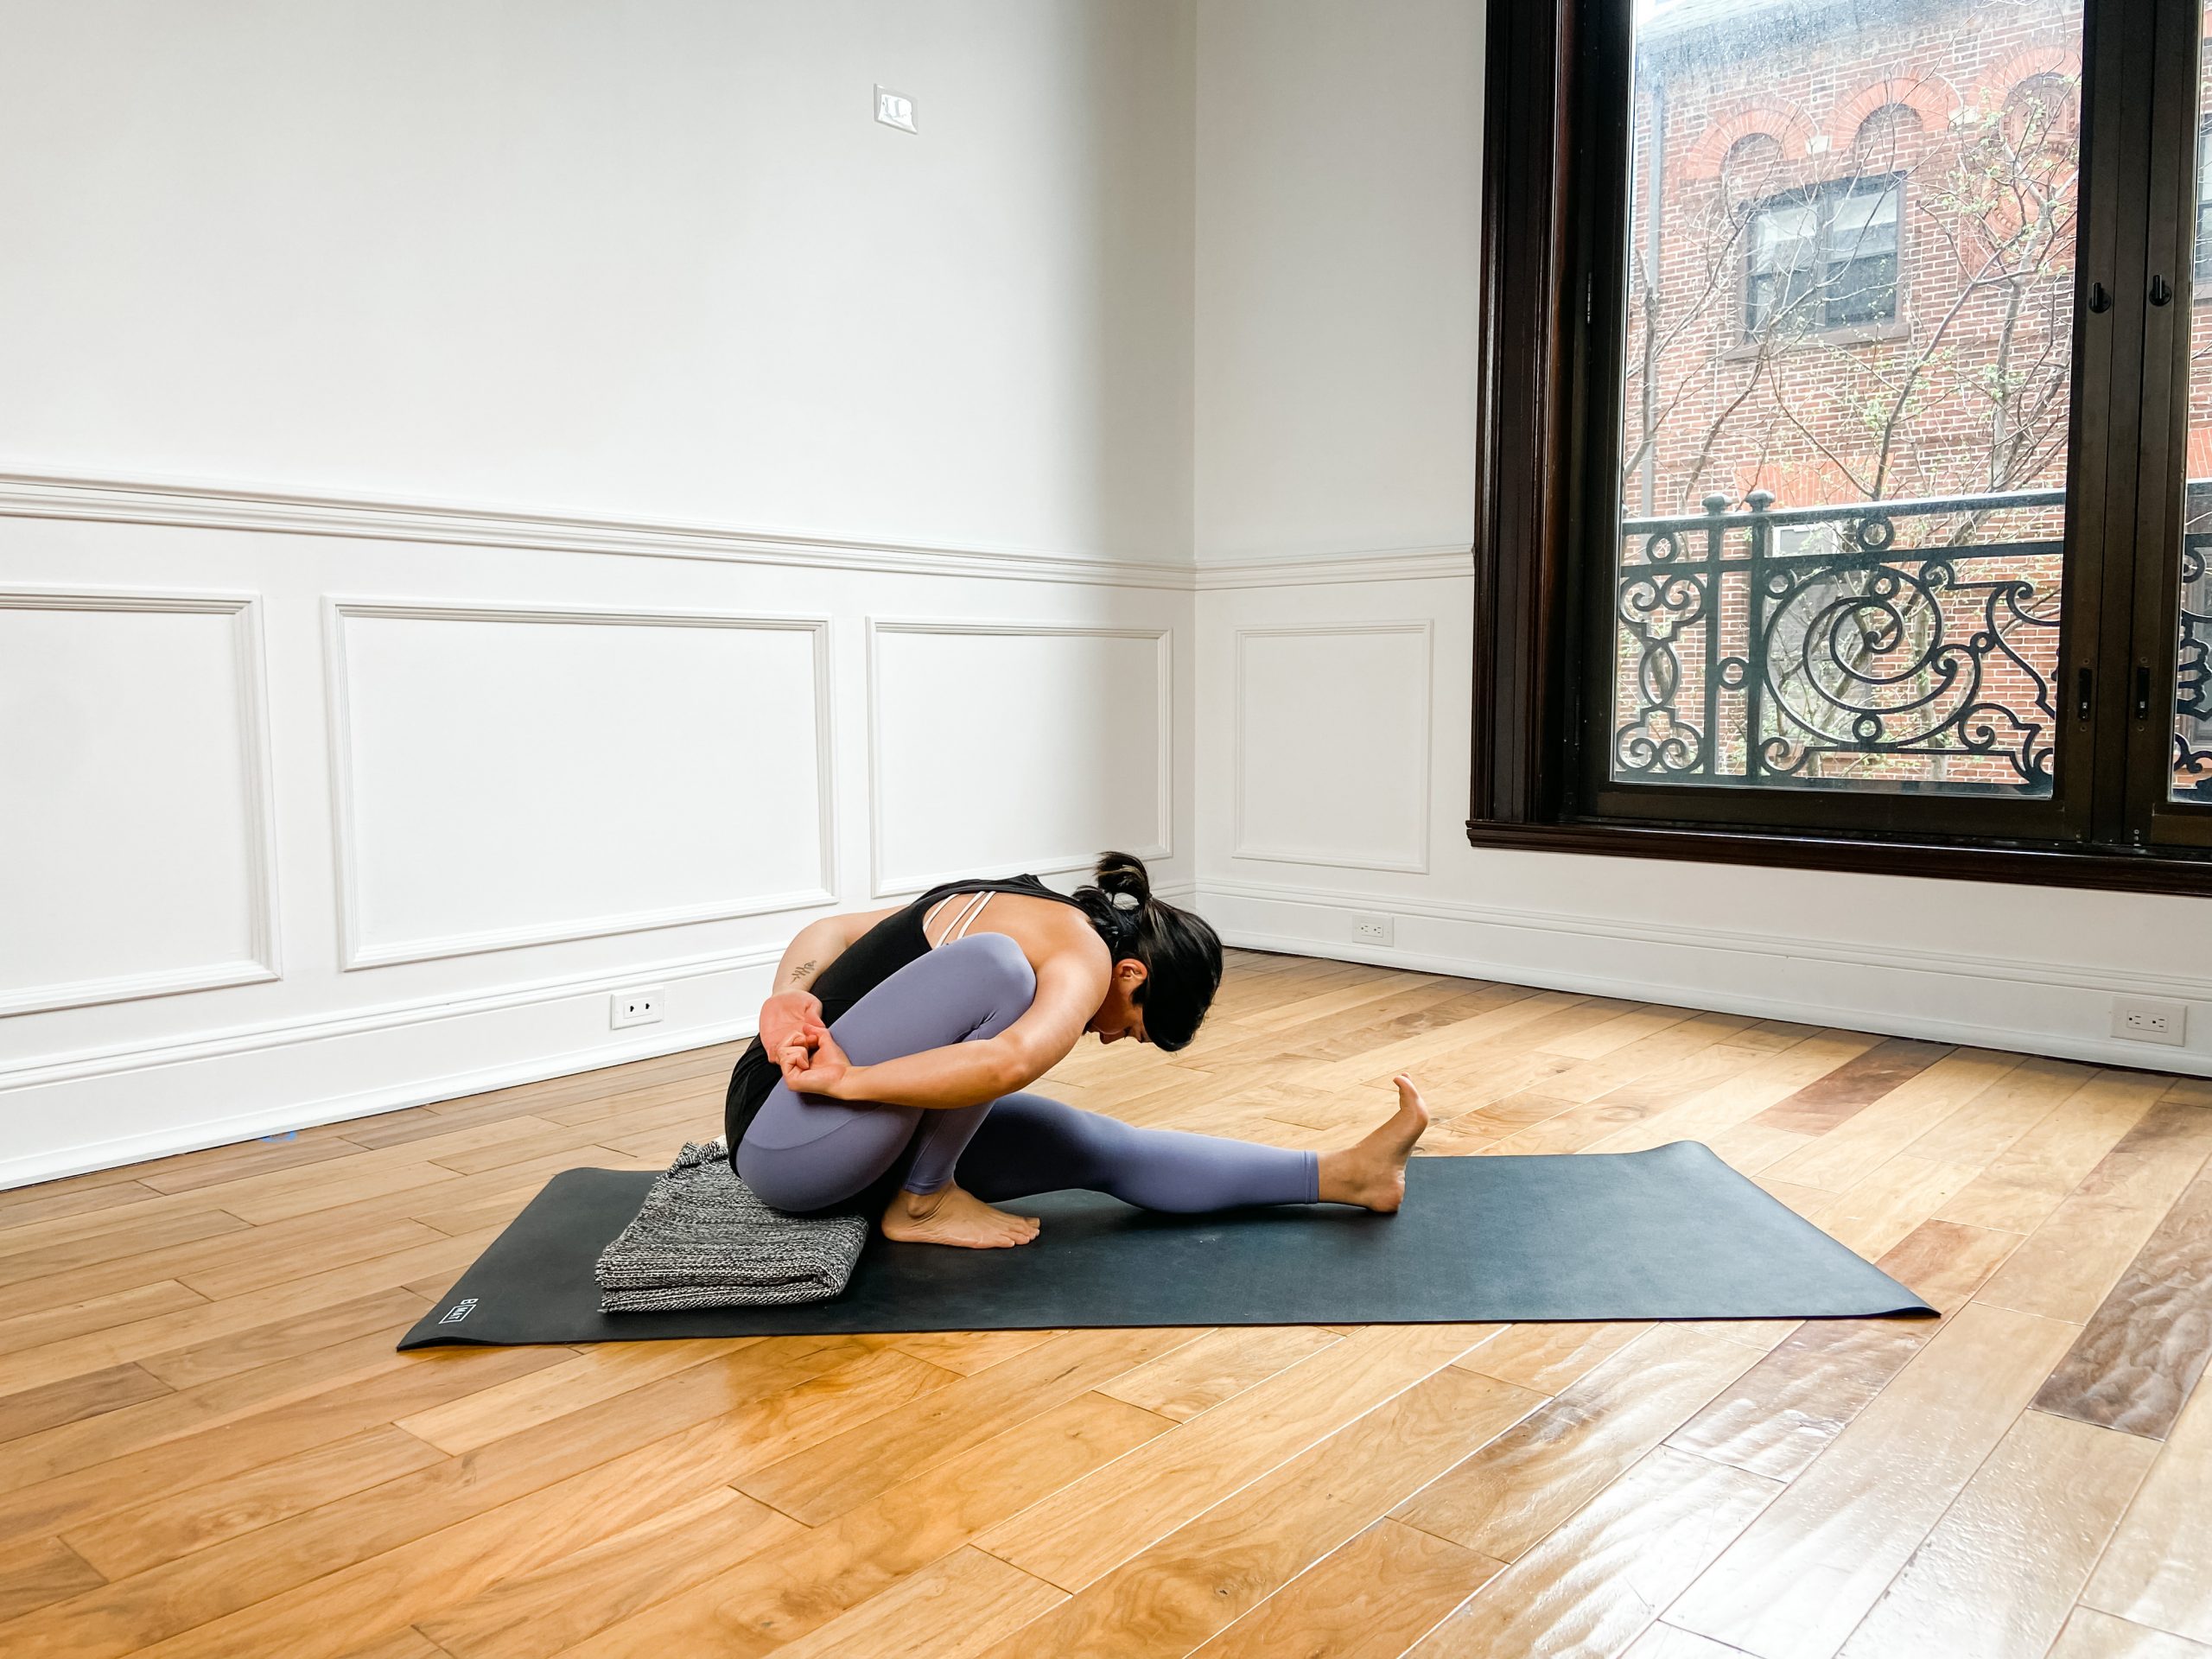
Peak Pose: Marichi Pose (Marichyasana I)

This pose is to honor Sage Marichi who is said to be one of the wise lords who heard Brahma’s words and translated them into Sanskrit. From these words, came the divine laws of the universe. This pose helps to stretch the spine and shoulders and brings the head down to rejuvenate the body and allows the practitioner to turn inward. The way the shape folds into itself and wraps around itself reminds me of the roots that we all have and can lean into for introspection and growth.
How to:
- Sit on a folded blanket with the sit bones on the blanket and the legs straight on the floor.
- Fold your right leg bringing your heel towards your bum. The more folded the leg, the less distance the arm has to travel around the leg.
- Lean forward and then reach the right arm forward like you are reaching towards the front of the room.
- Swim the arms behind your back. Yes, now your right arm is going around the right shin. Your hands will meet somewhere behind the right hip as opposed to behind the back.
- Once the hands are joined (you can use a belt), extend the heart forward and then fold bringing your nose towards your left knee. Keep the left leg clear and straight.